Showing posts with label Entree. Show all posts

Wednesday, January 13, 2021

Wholesome Buddha Bowl with Quinoa and Tofu


The holiday season here in America is over and so now I am trying to get back to eating healthier food. Healthy food does not mean cutting out on tasty food but instead eat food with more nutritional value that can help me stay fit. So lately I cut down on the intake of white rice and white pasta and replaced with quinoa, brown rice, ancient grains and whole wheat pastas, millets and whole wheat flours and off course ton of veggies. So in my quest of eating more wholesome food, I have started preparing various different nutritious Buddha bowls. They are perfect for either lunch or dinner and keep us fuller longer. 

What is Buddha bowl?

There are different versions of the story but according to one of them, Buddha bowl literally came from Buddha's bowl that he carried with him while on his journey to enlightenment. He would gather the vegetarian food in a bowl that the villagers offered to him and eat it at the end of the day. This vegetarian dish is served in a large bowl or a plate with high rims. It can have various elements of well balanced meal ranging from grains like quinoa or rice, protein such as Tofu, beans or paneer, vegetables of choice either steamed, roasted or raw and fruits of choice, etc. 

My family loves Buddha bowl especially when I add some Tofu or paneer to it. 

How to press Tofu?

Tofu is one difficult ingredient that is tricky for many people to handle. Also, not everyone is a fan of the texture of the Tofu. But you can say that I have been blessed in that respect as my family just like to eat tofu in any shape or form I prepare it. With that being said, we all love the crispy baked/air-fried tofu the most! In order to get the delicious crispy tofu, follow these steps:

1. Get firm or extra firm tofu from the store. 

2. Press it using Tofu-press for about 20 minutes. Alternatively, place Tofu block in a flat bottom strainer and press it with heavy weight plate on it for at least an hour. You can press Tofu beforehand to save some time on the day of preparing Buddha bowl.


3. Sprinkle your choice of spices and oil and bake the cubed tofu in the oven.


Roasted Veggies 

For this recipe I have used beetroots, baby carrots and bell pepper but you can use any vegetables of your choice, such as broccoli, sweet potatoes, cauliflower or mushrooms.

Beans

Beans are actually optional if adding protein like tofu in your bowl. But I love to have different textures in my bowl, so I added pinto beans. You can also use chickpeas or kidney beans. 

Grains

I have used quinoa in the recipe, but you can use any variation of rice, couscous or even mix of ancient grains as per your preference. 

Fresh salad and fruits

I had cherry tomatoes on hand but cucumber, cabbage or avocadoes could be used instead.  Also, feel free to include or exclude fresh fruit in the bowl. But they will definitely add some flavor to your dish. 


Wholesome Buddha Bowl with Quinoa and Tofu

Prep time - 30 minutes
Cook time - 35-40 minutes
Yields - 3 to 4 servings


Ingredients

For Cilantro lime quinoa:

1 Cup dried Quinoa rinsed and washed

1 1/2 Cup Water 

2-3 Tsp freshly squeezed Lemon juice

Handful of Cilantro rinsed and chopped

1/2 Tsp Olive oil

Salt to taste

For Pinto beans with Spinach:

1 Can Pinto beans - 16 oz rinsed and washed

1 Cup Baby spinach rinsed

1 Tsp Olive oil

1/4 Tsp Black pepper powder

1/4 Tsp Cumin powder

Salt to taste

For Roasted Veggies:

1 Cup Beets peeled and cubed

1 Cup Colorful bell peppers washed and diced

1 Tbsp Olive oil 

1/4 Tsp Black pepper powder

1/4 Tsp Cumin powder

Salt to taste

For Tofu + marinade:


1 Block of Extra Firm Tofu - 16 oz pressed and cubed

1 Tbsp toasted Sesame oil

2 Tsp Soy sauce

1 Tsp Siracha sauce (add more for spicier taste)

1 Tsp Maple syrup

Fresh fruits and veggies:

1/2 Cup fresh Cherry tomatoes rinsed 

2-3 Fresh Orange cubed or Fresh fruits of your choice 

Instructions:

  1. Preheat oven to 350F.
  2. In a medium bowl, add all the ingredients for marinade and combine well. Now add cubed tofu to the bowl and coat them evenly in marinade. Let the tofu marinate until we work on the remaining elements of the bowl.
  3. Now line the baking tray with foil and place all the veggies - beets, carrots and bell peppers on the baking tray. Drizzle olive oil and sprinkle black pepper powder, salt and cumin powder on the veggies. Mix well and roast in the oven for 15-17 minutes. 
  4. While the veggies are roasting, let's prepare Cilantro Lime Quinoa. Take quinoa in a bowl and wash them well, until the water runs clean. Now add quinoa, water, salt and olive oil to the Instant pot to cook them for 1 minute on manual high pressure and let the pressure release naturally.  
    • Alternatively, you can cook quinoa in a big pot on the gas stove. Boil 5-6 cups of water, add quinoa and cook them for about 10-12 minutes. Drain any excess water and place quinoa back in the pot. 
  5. Add chopped cilantro and lemon juice to quinoa and mix everything well. Taste check quinoa to adjust salt as needed and transfer Cilantro lime quinoa to a bowl. 
  6. Rinse clean the inner pot and place it back in the IP. Turn on the sauté mode and heat up olive oil. Add pinto beans and baby spinach to the pot along with the black pepper powder, cumin powder and salt. Mix everything well. 
  7. Cook until baby spinach leaves are wilted. Be sure to stir the beans and baby spinach frequently to avoid any burning at the bottom of the pot. Transfer everything to a separate bowl. 
  8. When the roasted veggies are ready, transfer them to a bowl and replace the foil if needed. Do not turn off the oven at this point as we will need to bake tofu in it. 
  9. Line the marinated tofu cubes on the baking sheet evenly, leaving some space between each cube for it to bake properly. 
  10. Place the marinated tofu tray in the oven and bake at 350F for 15 minutes. Remove the crispy baked tofu cubes from the oven when done. 
  11. Arrange all the elements - cilantro lime quinoa, crispy baked tofu, roasted veggies, pinto beans, fresh cherry tomatoes and orange cubes - of the Buddha bowl in a plate or in a bowl. Sprinkle some sesame seeds on top and drizzle some of the remaining tofu marinate liquid or hot sauce to add more flavors. 
  12. Enjoy the delicious flavorsome wholesome Buddha bowl! 


Thursday, November 5, 2020

Baked Butternut Squash Pasta


Fall is the season of colors and marks the beginning of the Holiday season. I absolutely love the fall colors and what better way to celebrate the season than to bring out the beautiful colors on a plate. This baked Butternut squash pasta with sautéed vegetables is my humble effort to celebrate the colors of the season. This bright and beautiful dish has smooth and creamy texture that complements the lightly sautéed and crunchy fall color veggies. This pasta dish is a complete meal and a delightful surprise for your friends and family this holiday season! 

This pasta is prepared with my favorite butternut squash that is so versatile that I prepare a different dish with it every time I bring it home. I have prepared soups, crisps, desserts and sometime I just add the chunks to my quinoa or rice dish. This time I have prepared pasta sauce with it. The sauce can be used to prepare not only this delicious baked pasta recipe but can also be used to prepare lasagna. Either way it will please your taste buds and will be loved by all. I have also added a surprise element in this pasta by sneaking in some fresh and juicy pineapple chunks in the sauce. The sweet pineapple brings out the best flavor of this fall favorite pasta. 


The Baked butternut squash pasta dish is vegetarian and egg-free. You can easily turn it into vegan dish by adding some vegan cheese or nutritional yeast. 

So let's get started...

Important notes/ tips

  • Butternut squash is very hard to slice through, so please use sharp knife that is big enough for the size of the squash. Refer to the recipe video to see the cutting process. 
  • I have used an entire medium size butternut squash for this recipe, you can adjust the quantity depending on the size of the squash. 
  • It is recommended to use fresh pineapple chunks but canned chunks can also be used. 
  • I have topped this pasta with some vegetarian parmesan cheese. But you can easily make this dish vegan by either skipping the parm cheese or topping the pasta with some nutritional yeast. 
  • Turn this dish to gluten free by replacing the regular penne pasta with gluten free pasta of your choice. 
  • I have used penne pasta for the recipe but you can use any other cylindrical shaped pasta. This would allow the creamy sauce to get inside the pasta and give an oozing result bursting with the sauce. 

Baked Butternut Squash Pasta


Prepare time - 15 minutes

Cook time - 1 hour 15 minutes

Serves - 4 to 6 

Ingredients 

2 Cup dry/uncooked Penne pasta 

1 Medium Butternut squash

1 Large carrot

1 Cup fresh Pineapple chunks

1/2 Medium white onion

3-4 Garlic cloves

1/3 Cup Parmesan cheese 

1/2 Cup Breadcrumbs 

2 Tbsp Vegenaise (optional)

2 Cup Water 

3 Tbsp Olive oil

1 Tbsp Dried oregano

1 Tbsp Dried thyme

1/2 Tbsp Black pepper powder

Salt to taste 

Water to  cook pasta 


Instructions

Preheat oven at 425F. Cut the head of the Butternut squash and then slice the squash in circular motion into half. Scoop out the seeds with a spoon. 

Line a baking tray with silicone mat or foil and place the butternut squash halves on it. Brush olive oil on the inner side of the squash, sprinkle the dry herbs and spices on the halves. Turn the squash and brush oil on the outer side of the squash. Place the squash halves into the oven keeping the squash halves facing down. Bake for 45 minutes. 

While squash is baking, prepare the pasta. Add dry pasta in IP and add water, oil and salt. Cook pasta in IP for 1 minute at high pressure. 

In the meanwhile, peel and dice carrot. Roughly chop onion and garlic. 

When pasta is done, quick release the pressure and drain the pasta. Transfer the pasta into a bowl.

In the same IP pot, add the remaining olive oil and turn on the sauté mode. When oil heats up, add roughly chopped onion and garlic and carrot. Add in the remaining herbs and spices and mix well. 

Sauté for 2-3 minutes and add water to the pot. Close the IP lid, set it to sealing. Switch IP mode to high pressure cook for 5 minutes. When cooking is done, let the pressure release naturally. 

Remove butternut squash from oven and check if it is soft and completely baked. Let it cool for 5 minutes. Carefully, remove the skin of baked butternut squash and chop it roughly in big chunks. Be careful if the squash is too hot. Hot steam can cause burns. Use knife to remove skin if needed. 

Open IP and add chopped butternut squash pieces to the pot. Combine well.

Puree the mixture using immersion blender. Blend until smooth pasta sauce is ready.  Now to make the sauce extra creamy, add in vegenaise to it and combine well. Further add pineapple chunks and mix everything well and keep aside. 

Preheat oven to 350F. 

In an oven safe tray, add cooked pasta and lay flat. Take half of the butternut squash pasta sauce and coat the penne pasta well. 

Now add a layer of the remaining pasta sauce on top of the coated pasta. Next, sprinkle parmesan cheese over the pasta and then generously sprinkle breadcrumbs on the top. 

Bake in the oven for 15 minutes or until you see crumbs turning golden brown. Place the pasta tray on cooling rack and let it cool down for 5 minutes before serving.

The hot and creamy Baked Butternut squash Pasta is ready to serve with sautéed vegetables.  


Wednesday, September 23, 2020

Baked Eggplant Parmesan - Vegetarian


Eggplant Parmesan is one of the classic Italian dishes that I was introduced to, through a friend of mine a few years ago. It was absolutely delicious when I first tried it and soon became one of my favorite dishes to order in a restaurant until I found out that it is really not completely vegetarian. This classic Italian dish uses egg as one of the basic ingredient and most restaurants' menu never has it listed. Sadly I quit ordering it, however sometimes I would crave for that authentic Eggplant Parmesan. Hence, inspired by the original classic dish, I decided to give this dish a try to see if I can make the eggless version of it. Though this was not the only reason for me to create this recipe. Eggplant is my husband's all time favorite vegetable and I wanted to make sure we can both enjoy our favorite Italian dish without having to worry about its ingredients.

To my surprise, I ended up making a pretty darn good Eggplant Parmesan recipe that is neither fried nor has eggs. The main challenge is to perfect the breadcrumb parmesan mixture and to make sure that the eggplants are cooked to perfection. This recipe covers both these aspects to get the best and most delicious Eggplant Parmesan. The breaded eggplant slices are coated with breadcrumb parmesan mixture and baked till perfectly tender then served with layers of marinara sauce and cheese. You can make this recipe for a date night or for celebration dinner or just to please your guests. Serve it complemented with the marinara sauce spaghetti or avocado pesto sauce spaghetti. My family just loves this dish every time I make it.

So let's get started with some important tips and notes to keep in mind before we dive into the recipe.

Important Tips/ Notes

  • Eggplant Parmesan is much like lasagna but without all the extra carbs from pasta. Try using the smaller eggplants that are ripe and have shiny skin. The smaller eggplants have less seeds and are less bitter. 
  • I have used store bought marinara sauce for this recipe to save time. But if you are feeling the pump to make fresh marinara then go for it. It will add 30-35 minutes but you will get an even better taste out of it.
  • Traditionally the breaded eggplant slices are fried first and then layered with marinara sauce and cheese to bake for few minutes. I have completely eliminated frying, and instead baked them with drizzle of olive oil to save ourselves from the unhealthy fats and calories. 
  • I have retained the skin of eggplant but if you like, feel free to peel the skin before you slice it. This will reduce cooking time a little bit so just keep check on your eggplant slices to avoid overcooking.
  • I have used garlic salt for the recipe. If you don't have it handy just use garlic powder or minced garlic and salt. 
  • I have used Panko bread crumbs for the recipe as they turn out extra crispy but any traditional breadcrumbs would also work.
  • I have used lesser quantity of cheese as we are not big on it. Feel free to add more cheese if you like your Eggplant Parmesan to be covered in cheese. 
  • Last but not the least, vegetarian cheese is an essential ingredient of this recipe. A lot of cheese brands use enzymes from animal rennet to prepare cheese, so look for vegetarian rennet or microbial rennet on the ingredients label of the cheese should you prefer to keep this recipe vegetarian.

Alright, so here is the video for the recipe, followed by detailed step by step recipe -


Baked Eggplant Parmesan Recipe 

Prep time - 45 minutes

Cook time - 35-40 minutes

Yield - Serves 5


Ingredients

2 Medium Eggplant

1 Cup Breadcrumbs

1/2 Cup Parmesan cheese (grated)

2 Tsp Black pepper powder

1 Tbsp Oregano

1 Tsp Dried basil

Handful of freshly chopped basil (optional)

1/2 Tsp Garlic salt

1 Cup All purpose flour

2 1/2 Cups Marinara sauce

1 Cup Shredded cheese (mozzarella or four cheese mix)

Water to make the batter

Olive oil to drizzle


Instructions

Begin with preparing Eggplant for baking. Slice the eggplants into 1/4" thick rounds and lay them on a cooling rack or a tray. Sprinkle the slices with salt and let them sweat for 15 minutes to release the moisture. 

While eggplant slices are resting, let's prepare the breadcrumb mixture. Combine breadcrumbs, Parmesan cheese, black pepper powder, oregano, basil (both fresh and dried) and garlic salt in a shallow mixing bowl.

Preheat the oven at 425F before we move further with the recipe.

Now prepare the dipping batter in another mixing bowl by combining dry all purpose flour and water. The consistency of the dipping batter should be rather runny than thick.

Further, pat dry eggplant slices to absorb the extra moisture gathered on top. 

Line the baking tray with foil and brush some oil on it to avoid sticking to the bottom of the slices.

Now, prepare your assembly line of eggplant slices, batter, breadcrumb mixture and baking tray in the same order. Take one slice, dip it in the batter and generously coat it in the breadcrumb mixture. Line each breaded eggplant slice in the baking tray and drizzle some olive oil over it. Please ensure to follow this step while using my video recipe as it is important to bake the slices perfectly.

Place the baking tray in oven and bake the breaded eggplant slices at 425F for 25 minutes or until the breading starts turning golden brown. Turn over the slices midway through the baking after approximately 12 minutes. 

Remove the baked eggplant slices from oven and place it on a cooling rack. 

Take another oven-safe pan or tray and spread marinara sauce at the bottom. In order to make a 3 tier tower of eggplant parmesan, place the first layer of the slices (the large ones) over the sauce. Now spread some marinara sauce and shredded cheese on top of the laid out breaded slices. Repeat this step while you stack the next two layers of breaded eggplant slices over this bottom layer as shown in the video above. I was short on shredded cheese so ended up topping the final layer with some cheese slice cuttings.

Bake these towers of Eggplant Parmesan in the oven at 350F for 15 minutes. 

Remove from the oven and let them rest for 5 minutes before serving. 

Serve these no-egg and no-fry Baked Eggplant Parmesan with your choice of spaghetti with red or green sauce. You can also garnish it with fresh basil or red chili flakes if you like is spicy. 


Saturday, August 1, 2020

Veggie Quesadillas with quick Salsa & Guacamole


Hola foodies, hope you all are having a great weekend! Today, I will be sharing one of my favorite and easiest Mexican recipes of all time - Veggie Quesadillas with quick Salsa and Guacamole. It is one of the simplest and classic Mexican dishes that you can try to start your journey for the Mexican comidas (foods) or simply further your quest...


So what are Quesadillas? Originated from Mexico, the name Quesadillas come from Spanish word Queso means cheese and it literally translates to "cheesy little things". Traditionally the tortillas are toasted with melted cheese and sautéd vegetable or meat. I usually buy tortillas from the store as you can get many varieties that suits your need. In a quest to make this dish healthy, I try to buy whole wheat tortillas. You can also find them prepared from white flour, corn flour, or mix grains. This time I brought whole wheat tortilla with chia seeds. I love making these for my kid as I can add all sorts of veggies and sometimes beans too. These get eaten without any complains as they taste so yummm especially when I layer them with cheese! 


Mexican meal is incomplete without Salsa, Guacamole and tortilla chips. No matter which Mexican dish I make, I always have these sides to make a complete dish. The combination of Salsa, Guac and crunchy tortilla chips is just something that I can never get enough of. So, I will also share a quick Salsa and Guacamole recipe to make with Quesadillas. I do have a special recipe if I am making them for a party or for guests. I will keep that recipe for some other time. :) 

Most of all the health benefits come from the cheese and the type of veggies added to make the quesadillas. Cheese is healthy if eaten in moderation as it provides much needed calcium and protein to our bodies. Typically when I am preparing Mexican meal, I choose to go with four cheese Mexican blend (mix of Monterey jack, Cheddar, Asadero and Queso quesadilla cheese) which gives so much more flavor to the food. Veggies, as as you may know, have abundance of nutrients and are low in calories and fats. 

                         
Additional notes/ tips

  • Any assortment of veggies can be used for stuffing. In my opinion, the vegetables that taste best in Quesadillas are corn, spinach, mushrooms, squash, zucchini, broccoli, carrots, colorful peppers, onions, etc...
  • Cheese is an essential ingredient for this recipe. However, if you wish to keep this recipe vegetarian, you would want to pick some vegetarian cheese. A lot of cheese brands use enzymes from animal rennet in making cheese, so look for vegetarian rennet or microbial rennet on the ingredients label of the cheese.
Let's get started with this simple yet delicious Veggie Quesadillas with quick Salsa & Guacamole recipe...

Serves 4
Prepare time 10 minutes
Cook time 20 minutes

Ingredients 

For Quesadillas

1 Pack Tortillas (6 ct)
1 Cup cheese
1/4 Cup Vegenaise (optional)
1/2 Corn (Boiled)
1 Medium Zucchini
1/2 Green pepper
1/2 Red pepper
1 Tbsp cumin powder
1 Tsp oregano
1 Tsp black pepper powder 
2 Tbsp Oil for grilling vegetables
Oil for toasting Quesadillas 
Salt to taste

For 5 minute Salsa (Mild)

2 Medium tomatoes
1 Small red onion
1 Small bunch cilantro
1/2 Tsp Oregano (Prefer Mexican oregano)
1/4 Tsp Black pepper powder
1/2 Lemon
Salt to taste

For 2 minute Guacamole 

1 Medium Avocado
1/2 Lemon
1 Tbsp salsa 
Salt to taste


Instructions

Evenly dice all the vegetables listed above for Quesadillas, i.e. red and green bell peppers and zucchini. Remove corn kernel from the cob.  


Heat up oil in a pan and add all the diced vegetables and corn, and sauté them for about a minute. 


Add salt, cumin powder, black pepper powder and oregano. Mix everything well.


Sauté the vegetables for 4-5 minutes until they turn slightly brown. Turn off the heat and transfer the veggies to a bowl. Let the stuffing cool down. 


While the veggies are cooling down, let's quickly make the Salsa and Guacamole. 

To make Salsa, roughly chop tomatoes, onions and cilantro. Add them to the chopper along with salt, pepper, oregano and lemon juice. 


Chop everything finely and voila Salsa is ready. Transfer into a bowl and garnish with lemon slice and cilantro. 


To make Guacamole, cut the avocado to half and de-seed it. Roughly chop avocado and add to the chopper along with salt, lemon juice and one spoon of salsa you just prepared.


Since avocados are soft, when you run chopper they will turn into smooth creamy dip - Guacamole. Alternatively, you can also make Guacamole without a chopper. Just use a fork to smash the chopped avocados and mix the spices. Transfer in a bowl and garnish with avocado seed. The avocado seed also helps to keep the Guacamole from turning black. Quick 2-minute Guac is ready to serve!


Getting back to Quesadillas, once the stuffing has cooled down, spread vegenaise on the tortilla. Just spread on one half of the tortilla as shown in the picture below. This step is optional, if you don't have vegenaise, just skip to next step. However, I recommend adding vegenaise to make the Quesadillas creamy! 


Now spread the sautéd vegetables over the layer of vegenaise on the tortilla. Here you can add as thick of a layer of veggies as you desire.


Next generously spread cheese over the veggies. Again you can add as little or more cheese per your desire. 


Fold the tortilla and keep it aside. Repeat the same process on the rest of the tortillas.


Next heat up the pan on a medium flame. Drizzle about 1 tbsp of oil.


Place two of the folded tortillas on the pan as shown in the picture below. Toast them for about a minute or until the tortillas are nicely toasted with brown spots at the bottom. 


Flip them over to toast the other side. If you are comfortable, you can flip them inside the pan. Otherwise transfer them to a plate, flip them and slide back to the pan. 


Again toast them for another minute to toast evenly. 

Transfer them to a plate and repeat the process with the rest of the folded tortillas. Slice them with a knife or cutter in your preferred shape.


Hot, cheesy and loaded with veggies Quesadillas are ready to eat. Serve them with tortilla chips, salsa and guacamole. 


Saturday, July 25, 2020

Thai Red Curry


Hi foodies, its time for another delicious flavorful recipe! Today, I am going to share a very easy-to-prepare recipe for the Thai Red Curry. 

I am fond of Asian cuisines including Thai, mostly because the preparations are distinct in flavor! They are rich in texture and have complex flavors that suits perfectly for my foodie palate as I am all about flavors and spices. What attracts me more to Thai curries is the ease of adding versatile veggies along with protein. It makes a complete meal when combined with white, brown or fried rice. 

The base gravy for Thai red curry is prepared using Coconut milk. It makes the curry rich and creamy.  Consuming Coconut milk in moderation could provide some great health benefits as they are high in mineral and vitamins including calcium, potassium, magnesium and iron. 


The other important ingredient in this curry is Tofu. According to some sources, Tofu was originally called "Okabe" until early 1400s. It didn't come to western world until around mid 1900s. In fact I wasn't even aware of this protein rich alternative to meat until early 2000s. Since we are making vegetarian version of the curry, I highly recommend to add protein in the form of Tofu. Apart from providing high contents of protein, this substitute of meat is low in calories and is an excellent source for calcium and iron. Additionally, it contains all essential amino acids, magnesium, zinc and Vitamin B-1. Tofu has zero cholesterol in it and may also help reduce LDL (bad cholesterol) in our bodies. I would suggest you try to include Tofu if you are able to find it in the nearby grocery store.

One more key ingredient in this recipe is the rainbow of vegetables. As I mentioned earlier, the recipe is so flexible that you can add versatile vegetables of your liking. The more vegetables the merrier the curry. Needless to say that vegetables have abundance of nutrients, you can take your pick! Apart from being low on fats and calories, mostly all the vegetables are high in dietary fibers and are loaded with minerals and vitamins. You could experiment with different vegetables each time you make this delicious warm curry! 

So let me bring to all of you, my version of Thai red curry loaded with vegetables and tofu.


Tips (Additional notes) - 

  • Any assortment of vegetables can be used for this curry. Here is a list of some popular vegetables for this curry - broccoli, yellow squash, zucchini, bamboo shoots, cauliflower, etc.   
  • It is absolutely okay to use store bought red curry paste, as sometimes it is difficult to find all the ingredients needed to prepare it at home. I use store bought vegetarian curry paste free of shrimp or fish oil. Be sure to check the ingredients before buying any store brands. 
  • Try to use full fat or premium coconut milk to add richness to the curry.
  • You can use dry basil if fresh sweet basil is not available.
  • Tofu is optional, I like using firm or extra firm. You can also saute them in a pan before adding to the curry. 
  • If you are omitting tofu then you  may want to add more vegetables to the curry.
  • Simply increase coconut milk and water quantity if you like more gravy.


Ingredients -
Serves 4
Prepare time - 10 minutes 
Cook time - 25-30 minutes 


1/2 Green bell pepper 
1 Carrot     
6-8 Mushrooms 
4-5 Baby corn 
10-12 String beans
Handful of Sweet basil leaves 
            

1 Can Coconut milk (Preferably full fat/premium)
1/2 Block Tofu (Optional - Preferably firm or extra firm)
2 Tbsp Red curry paste 
1 1/2 Tbsp Oil
2 Tsp Soy sauce
1 Tbsp Lemon juice/ 1 Tsp Vinegar
1 Tbsp Peanut butter (Optional) 
1 Tbsp Honey/ Sugar
1/2 Cup Water
1 Tsp Sriracha (optional)
Salt to taste


Instructions - 


Evenly slice all the vegetables including carrot, bell pepper, string beans, baby corns and mushrooms. I sliced them about 1/3" thick. This is important to ensure veggies are cooked evenly. 


Heat up oil in a wok or a pan, and add all the sliced vegetables except mushrooms. 


Saute the veggies for about a minute or until the veggies are slightly cooked. Then add mushrooms and saute for another 2-3 minutes. We want the veggies to remain crunchy and not become soft or overcooked.


Now add salt, soy sauce, red curry paste, peanut butter and honey/sugar to the vegetables. Mix the spices and sauce well without breaking the sliced vegetables. 


Add coconut milk and water to the veggies. Keep the flame on low and let the curry simmer for 2-3 minutes, until bubbles start forming and oil begins to separate.


Add lemon juice or vinegar to the curry. Cover the pan and let the vegetables soak all the flavors for about a minute.

Simmer on a medium flame for 3-5 minutes, stirring occasionally, until the desired consistency of the curry is achieved and the vegetables have softened to your liking.  

Finally, add sliced tofu and roughly chopped sweet basil leaves. Gently mix the tofu in the curry. Simmer for one more minute.


Turn off the flame, transfer the curry to a bowl, and garnish with sweet basil leaves.


Serve this warm comforting curry in a plate with either white, brown or fried rice. You can also sprinkle some red chili flakes or add some sriracha for a little more punch.


Sunday, July 19, 2020

Restaurant style Shahi Paneer (The Royal Cottage Cheese)


Shahi Paneer is one of the most popular North Indian Paneer delicacies made in India. Shahi Paneer literally means the Royal Cottage Cheese. Though it is known as North Indian curry, this curry has its roots in Mughlai cuisine. The name comes from the richness and flavors of the gravy that the Paneer is prepared in. The richness and creaminess of the gravy comes from the use of cashews, cream (malai), tomatoes and onions, while the flavors come from the use of whole spices. The thick creamy gravy can easily leave one craving for more! Whenever I make this delish curry at home, I make some extra gravy so that we can devour the gravy with Parathas or rice. 


Since we are talking about Shahi Paneer and its richness, it naturally brings us to think if this is a healthy meal that you would like to prepare for the family. So let me tell you, Shahi Paneer may not be a dish that you would like to prepare for your daily diet but this is definitely a show stellar if you are preparing it for an occasion or for a weekend treat. Moreover, you could make this dish healthier if you take certain measures like using Ghee (Clarified butter) instead of butter or substitute some of the cream with yogurt. Also, I avoid frying Paneer which saves us from a lot of unwanted fats and calories. You can serve the curry with whole wheat Roti, Paratha or naan (what I usually do) instead of rice or white naan (made from maida/all purpose flour). 


Oh and let's also review some health benefits of the ingredients. Paneer is freshly made cheese by curdling milk and is an excellent source of proteins, calcium, selenium and potassium. Paneer also contains Omega 3 and Omega 6 fatty acids that helps strengthen your bones and teeth. Thus, it is very important for vegetarians who do not get sufficient intake of these nutrients from eating meats or eggs. I usually try to prepare Paneer at home rather than buying from the store. It is very easy to prepare, as it takes only a few minutes to make it and is free of preservatives. On the other hand, the whole spices used to make the gravy help with digestion along with providing a lot of health benefits including anti-diabetic and anti-inflammatory benefits. So here's the rich and healthy dish to please your palate for an occasional retreat...

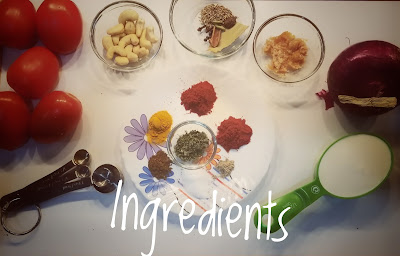
Let's start from gathering ingredients for this restaurant style Shahi Paneer. 

Ingredients  (Serves 4)
Prepare time - 15 minutes
Cook time - 35 minutes


5 Medium tomatoes
1  Large Onion 
1 1/2 Tbsp Ginger Garlic paste
200 - 250 gm Paneer 
1/2 Cup Heavy cream/ Malai
10-12 Pcs Cashew
1 Tsp Jeera (Cumin seeds)
3 Cloves
1 Cinnamon stick 
2 Pods Green cardamom 
1 Pod Black cardamom 
4-5 Peppercorn 
1 Bay leaf
1 Tbsp Kasoori methi
1 Tbsp Kashmiri red chilli powder (divide into 2 parts)
1 Tsp Turmeric powder
1 Tsp Garam masala powder (optional)
1/2 Tsp Sugar (optional - use if tomatoes are sour)
1/4 Tsp Cardamom powder 
1 Tbsp Oil 
1 Tbsp Ghee (Clarified butter)
2 Tbsp Butter
1/2 Cup Water
Salt to taste

Let's begin cooking...

Take a big saucepan or kadhai and heat up Ghee and Oil at a medium to high flame. 


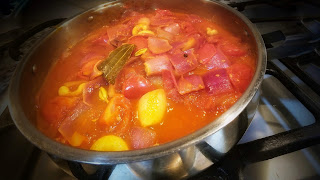
Roughly chop tomatoes and onions; add them to the saucepan. Lightly saute for 1 minute on a medium flame without turning the onions brown.


Now add Ginger garlic paste and mix it well. Saute for another minute or two until the raw smell of garlic is gone. 


Next add all the whole spices including Jeera, Cloves, Cinnamon, Green cardamom, Black cardamom, Peppercorns and Bay leaf  along with Cashew pieces. Mix it well.


Add powdered spices including Garam Masala (if whole spices in above step are not added), half of the Kashmiri red chilli powder, and Turmeric powder.


Add water and cover the pan or kadhai with a lid. Let this mixture cook for about 20 minutes at a medium flame while stirring occasionally.


Now turn off the heat and remove all the whole spices. I removed Cloves, Cinnamon, Green cardamom, Black cardamom, Peppercorns and Bay leaf. But you can leave black Peppercorns in, if you like to make it little more spicy. 


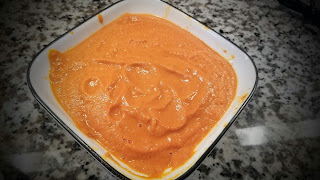
Let the mixture cool down completely before adding everything to the the blender. Blend everything into a smooth gravy. 


Take a big strainer and sieve the gravy into a bowl, this step is essential to make silky smooth gravy. Discard the residue.


Now heat up a saucepan or kadhai and add butter. When melted, add remaining Kashmiri red chilli powder. Give it a quick stir, don't let it burn. 


Immediately add sieved gravy to the saucepan and mix well. 


Now add Heavy cream/ malai (leaving some aside for garnishing), Cardamom powder and Kasoori methi powder to the gravy, stir it well. Kasoori methi is a must in any North Indian recipe.. don't skip it. 


It's time to add the main ingredient of the dish that defines the curry - Paneer. Add cubed Paneer pieces and gently mix everything without breaking the Paneer cubes. 


Cover and simmer for 2-3 minutes and let the Paneer soak in all the flavors. Turn off the heat. 

Drizzle remaining heavy cream or malai on the top before serving this palatable Restaurant style Shahi Paneer warm with Paratha, Naan or Rice.


Additional Notes - 

I used homemade Paneer with fresh herbs in it to infuse more flavors to it. You can use plain Paneer instead, without compromising on the taste.

I have used Jeera/Cumin seeds here, you can also use Shahi Jeera (Caraway seeds) to add an earthy royal touch to the curry.

Since this is Shahi Paneer, it is a great idea to add other nuts if you have them handy. Instead of using only cashews, you can use half soaked almonds and half cashews.

Add Garam masala powder to the curry if you don't have whole spices as mentioned in the recipe.

Add Sugar only if Tomatoes are sour otherwise skip it.

You can avoid using butter completely. Instead simply use the same amount of Ghee (Clarified butter). It is a healthier option. 

To make this recipe Jain, avoid using Onions and Garlic. Add Capsicum/ Green bell pepper instead to the Curry.